Primitive Technology: Pottery and Stove
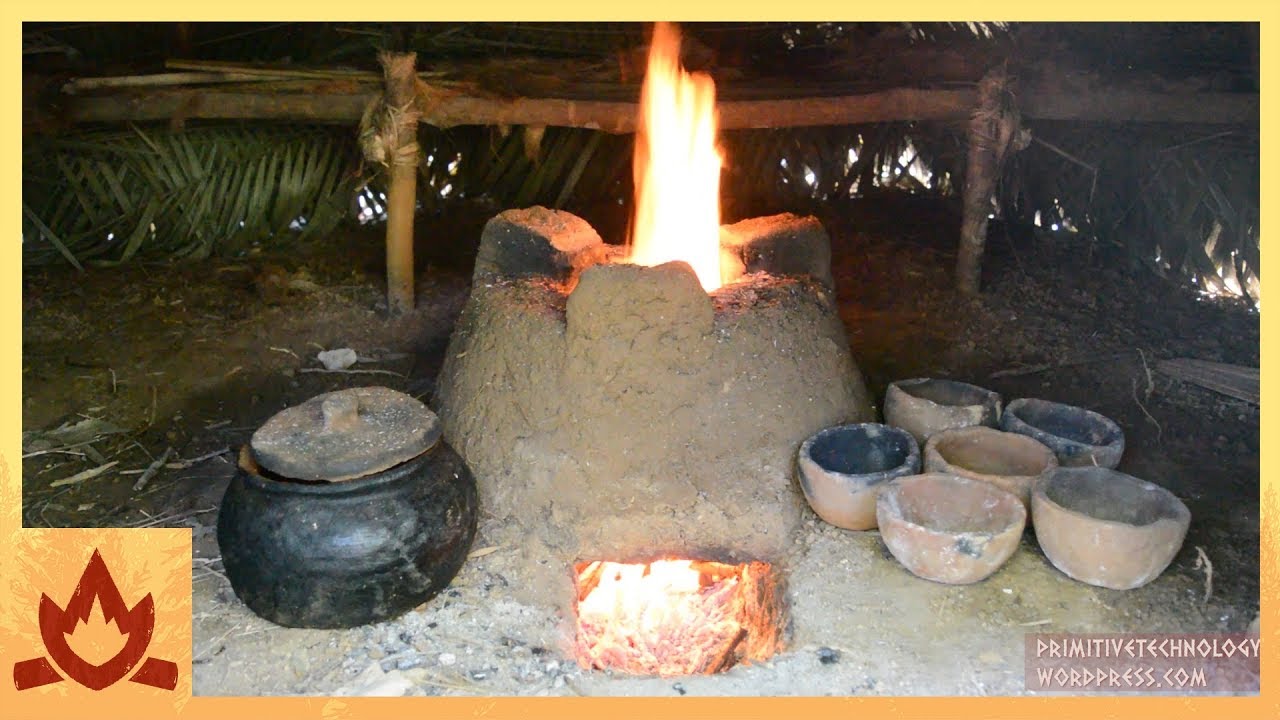
I made some pottery from the clay in the new area to see how well it performed. A large bank of clay was exposed by the side of the creek. I dug it out using a digging stick and took it back to the hut. Small sticks and stones were picked out of the clay and the whole mass was mixed to make sure there were no dry lumps. When this was done the clay was then left next to the fire to dry slightly so that it became a stiff workable material to form pots from. No further processing was done to the clay.\nI formed small pinch pots from the clay by taking balls of it and pinching out the shape of the pots. Small cracks that formed while shaping were simply mended by wetting and smoothing over. Several pots were made this way. They were then left to dry completely next to the fire until they were completely dry. \nTo fire the pot, it was placed upside down in the hot coals and covered with sticks in a tipi fashion. The wood both acts as fuel and protects the pot from sudden changes in temperatures such as those caused by sudden winds. When the fire was burning well, I increased the temperature of the fire by fanning it with a fan palm frond. The pot glowed red hot amongst the coals and so was fired to a sufficient temperature. After waiting overnight, the pot was retrieved from the ashes and struck with a stick. The pot gave a clear ringing sound indicating it was strong and had no cracks (hollow sounds indicate the opposite). Now I had a small bowl to carry water in.\nA larger pot was then made from the same clay. This time the walls of the pot were built up using the coil technique where long rolls of clay were rolled and then squashed onto previous layers. The last layer was pinched outwards to form a pot lip. A lid was made for the pot by making a flat disk of clay with a small handle for lifting. When dried the pot was then fired as before but in a larger pit outside the hut. Again, the pot was covered with wood protecting it from sudden breezes that might cool or heat the pot suddenly, possibly causing cracks. The firing went well and the pot sounded strong when struck.\nThe pot was then placed on 3 rocks and a fire lit underneath. It took close to 30 minutes to boil this way with lots of sticks. But it did eventually come to the boil. I then made a stove inside the hut. The fire pit was dug and extended into a trench, sticks laid over the entrance and mud mixed from the excavated dirt was then used to form the walls of the stove over the trench. The stove was about 30 cm internal diameter but came in to about 20 cm. Three raised lumps were made on the top of the stove to hold the pot above. Then the stove was fired. Note that wood can be placed over the entrance of the stove at ground level and lit in a hob firebox like configuration. The flames then get sucked down and then up into the stove. I show this because it’s an easy way to manage the fire without making it too big which might burn the thatch.\nWhen the pot is on the stove, it’s easier just to put sticks straight into the top of the stove between its open top and the sides of the pot. If over stacked with wood, wood gas is produced burning in a second fireball above the stove. It’s best just to keep the flames big enough to surround the pot (to reduce fire hazards). The pot was quicker to come to the boil then over a three stone fire.\nThe clay here in the new place is good, it didn’t take me long to make pottery here. Notably this clay doesn’t seem to need grog or temper added to it to prevent it from cracking. I think this is due to tiny specs of mica that weren’t present in the clay from my old area. The clay seems stronger and there also seems to be much more of it everywhere. The pot boiled after a while of tending, in future I’ll probably make thinner walled pots so that they boil quicker. The stove was useful for boiling the pot. It also seems to reduce the amount of smoke in the hut and increase the life of the coals in the base so that the fire could be re stoked at a later time.
Channel
Primitive Technology
Views
3.9M